|
LemLib
0.4.7
An easy to use and feature-rich PROS template
|
|
LemLib
0.4.7
An easy to use and feature-rich PROS template
|
Welcome to LemLib! This tutorial will walk you through the basics of LemLib and how to get everything set up.
LemLib is a PROS template, so you can use it with any text editor. However, we recommend using Visual Studio Code, as it has the best support for PROS.
To install visual studio code, go to https://code.visualstudio.com and download the installer for your operating system
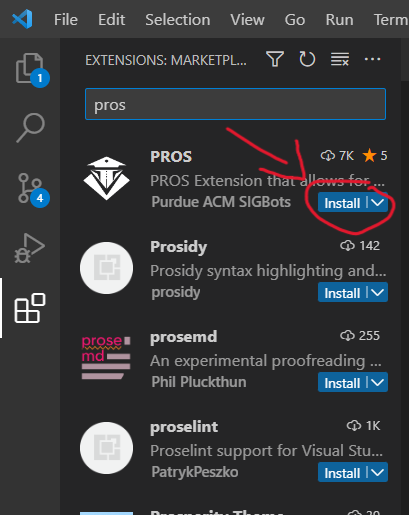
Once you have installed it, open it and install the PROS extension. You can do this by clicking typing Ctrl+Shift+X (⌘+Shift+X on Mac), searching for "pros", and clicking the install button.
And finally, we can create a new project. Navigate to the new PROS tab on the left, and click the "Create New Project" button. Select a folder, a name, v5, and when asked to select a version, select "latest".
Now we can install LemLib!
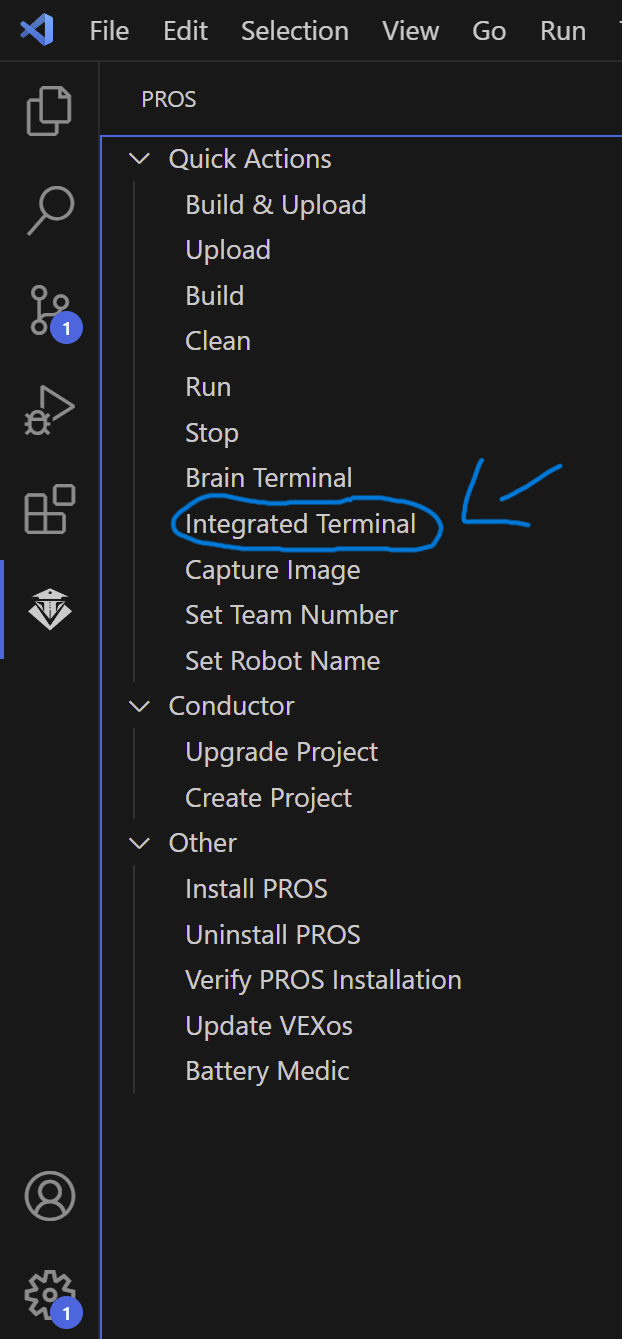
To install LemLib, you need to download the LemLib@0.4.7.zip from here. Next you need to drag the zip file into your pros project folder. Once you have done that, open the pros integrated terminal by selecting the pros icon on the left, and clicking Integrated Terminal.
Next, you need to run the following commands in your PROS terminal:
Finally, put the following at the top of your main.cpp file:
You are now ready to start using LemLib!